Workspaces in the Overview Section
A workspace is a named configuration of the interview table: a set of visible columns, their order, and width. Workspaces let you quickly switch between different table layouts for specific tasks without reconfiguring manually each time.
Settings are saved on the server and restored on the next login from any device.
Default Workspace
When you first open the Overview page, the default workspace is displayed — a preset set of the main columns.
The default workspace cannot be modified or deleted. You can use it as a starting point for creating your own workspace.
How to Create a New Workspace
- On the Overview page, locate the workspace switcher at the top of the table.

- Click the Columns button in the table toolbar.
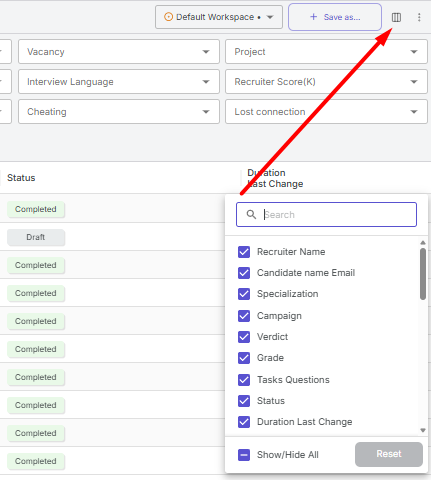
- In the panel that opens, enable or disable columns by checking or unchecking them.
- To change the order of columns, drag the desired column by its header in the table.
- To change the width of a column, drag the right edge of its header.
- When the configuration is ready, open the workspace switcher and click Save as new workspace.
- Enter a name and click Save. The workspace will appear in the list.
The maximum number of workspaces is 10. Workspaces are linked to your account and are not visible to other users.
How to Switch Between Workspaces
Open the workspace switcher at the top of the Overview page and select the desired workspace from the list. The table will automatically update to the saved configuration.
How to Delete a Workspace
- Open the workspace switcher.
- Find the workspace and click the delete icon next to its name.
- Confirm the deletion.
The default workspace cannot be deleted.